-
[4강 정리] Flask, GET요청, POST요청웹개발 종합반 2023. 8. 3. 23:35728x90더보기
배운것
1. Flask란?
2. GET, POST 요청
[목표]
- Flask 프레임워크를 활용해 API를 만들 수 있다
- [화성땅 공동구매] 프로젝트를 생성해 API를 만들고 클라이언트에 연결한다
- [스파르타피디아] 프로젝트를 생성해 API를 만들고 클라이언트에 연결한다
🔷 1. Flask
: 파이썬의 웹 프레임워크로, 웹 애플리케이션을 개발하기 위한 도구이다.
Flask는 간결하고 가벼운 설계로 알려져 있으며, 사용하기 쉬운 인터페이스와 유연한 확장성을 제공한다.

사용순서
1. app.py만들고 가상환경(venv) 을 잡는다. (이름 변경 가능)
$ python -m venv venv
2. flask 라이브러리를 담기
$ pip install flask
3. 새폴더 -> templates 만든 후 index.htm 생성하기 (templates 스펠링오타 주의하기)
📌 Flask는 만들 프로젝트의 폴더 구조가 정해져 있기 때문에 꼭 규칙을 지켜서 만들자!🌟 통상적으로 flask 프레임워크를 쓸 때 가장 flask를 실행시길 가장 기본이 되는 python파일을 app.py라고 명명한다.
◼ templates 폴더
HTML 파일을 담아두고 불러오는 역할을 한다.// app.py from flask import Flask, render_template app = Flask(__name__) @app.route('/') def home(): return render_template('index.html') if __name__ == '__main__': app.run('0.0.0.0',port=5000,debug=True)from flask import Flask, render_template
app = Flask(__name__)
@app.route('/')
def home():
return 'This is Home!'
@app.route('/mypage')
def mypage():
return render_template('index.html')
if __name__ == '__main__':
app.run('0.0.0.0',port=5000,debug=True)👉주소창에 [주소 / ]를 입력하면 template의 index.html을 보여준다.
단, 사용전 render_template를 반드시 임포트 해줘야 한다.
🔷 2. GET 요청
: "통상적"으로 데이터 조회(Read)를 요청할 때 사용하며, URL 뒤에 물음표를 붙여서 key=value로 전달한다.
데이터의 단순조회에 주로 사용한다.

// app.py

from flask import Flask, render_template, request, jsonify
app = Flask(__name__)

@app.route('/')
def home():
    return render_template('index.html')

@app.route('/test', methods=['GET'])
def test_get():
   title_receive = request.args.get('title_give')
   print(title_receive)
   return jsonify({'result':'success', 'msg': '이 요청은 GET!'})

if __name__ == '__main__':
   app.run('0.0.0.0',port=5000,debug=True)
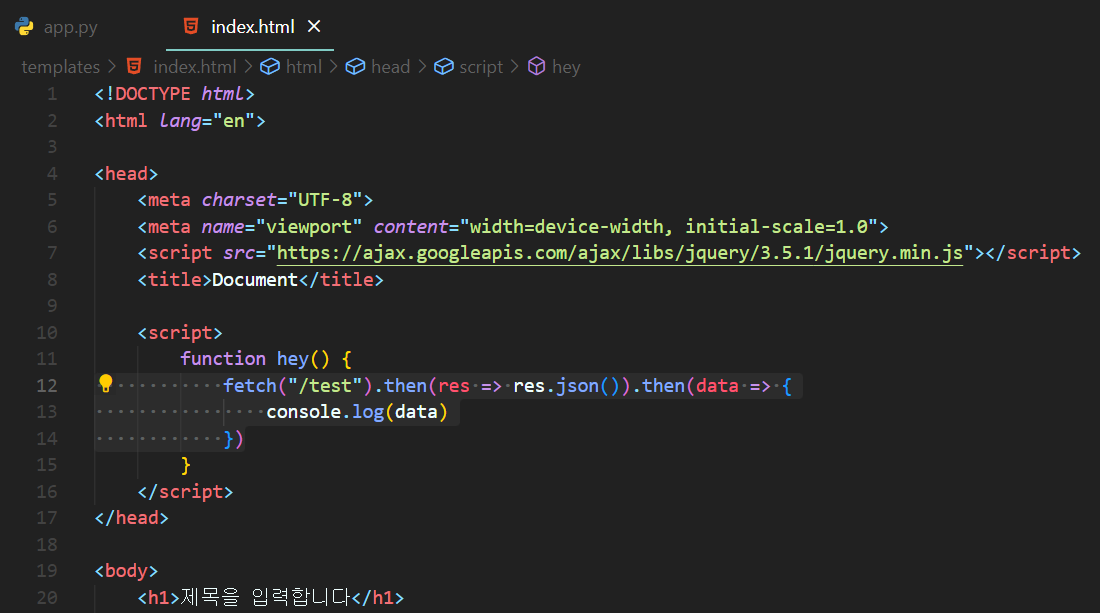
// index.html
// GET요청 fatch코드

fetch("/test").then(res => res.json()).then(data => {
		console.log(data)
})
👉 API를 만들고 사용하는 과정에서는 Flask에 request와 jsonify라는 기능이 필요하다.
임포트에 request, jsonify 등록하기
app.py 해석)
@app.route('/test', methods=['GET'])1. /test라는 창구로 = (.route('/test', )
2. GET요청으로 들어온다 = (methods=['GET'])
title_receive = request.args.get('title_give')print(title_receive)3. 만약 title_give라는 데이터가 있으면 가져와서 title_receive라는 변수에 넣고 (= request.args.get('title_give'))
4. 그 데이터를 print 한다.( print(title_receive))
return jsonify({'result':'success', 'msg': '이 요청은 GET!'})5.result는 success, msg는 '이 요청은 GET!'으로 내려준다.
index.html 해석)
fetch("/test").then(res => res.json()).then(data => {console.log(data)})/test라고 하는 url에 요청을 해서 데이터를 받고 그걸 console에 찍어보자.
🔷 3. POST 요청
: "통상적"으로 데이터 생성(Create), 변경(Update), 삭제(Delete) 요청을 진행할때 사용되며, GET요청과는 다르게 주소창에서 보이지 않는다.
데이터를 조작할때 주로 사용된다.
// app.py

@app.route('/test', methods=['POST'])
def test_post():
   title_receive = request.form['title_give']
   print(title_receive)
   return jsonify({'result':'success', 'msg': '이 요청은 POST!'})
// index.html let formData = new FormData(); formData.append("title_give", "블랙팬서"); fetch("/test", { method: "POST", body: formData }).then(res => res.json()).then(data => { console.log(data) }) // GET요청과 다르게 fetch 부분에 { method: "POST", body: formData }가 있다.formData를 생성 후 거기에 데이터를 실어서 보내준다.
해석)
<script>function hey() {let formData = new FormData();formData.append("title_give", "블랙팬서");title_receive = request.form['title_give']print(title_receive)1. html의 title_give가
2. py의 title_give로 들어오고
3. title_receive로 받아서 프린트해준다.
fetch("/test", { method: "POST", body: formData }).then(res => res.json()).then(data => {console.log(data)
})4. 그리고 .py의 resurt값이 .html의 data값으로 들어온다.
728x90'웹개발 종합반' 카테고리의 다른 글
[3강 정리] MongoDB, pymongo 저장, 조회, 변경, 삭제 (0) 2023.08.03 [3강 정리] 파이썬(Python) 반복문, venv 설정, 웹크롤링(bs4), select, select_one (0) 2023.08.03 [2강 정리] Javascript, 리스트, 딕셔너리 , JQuery, forEach, append, JSON, Fetch, API (0) 2023.08.03 [1강 정리] HTML, CSS(중앙정렬, 파일분리) 백그라운드 이미지 채우기, 이미지 어둡게 (0) 2023.08.03